| Menu |
Default |
Firmware IJV |
| 1 |
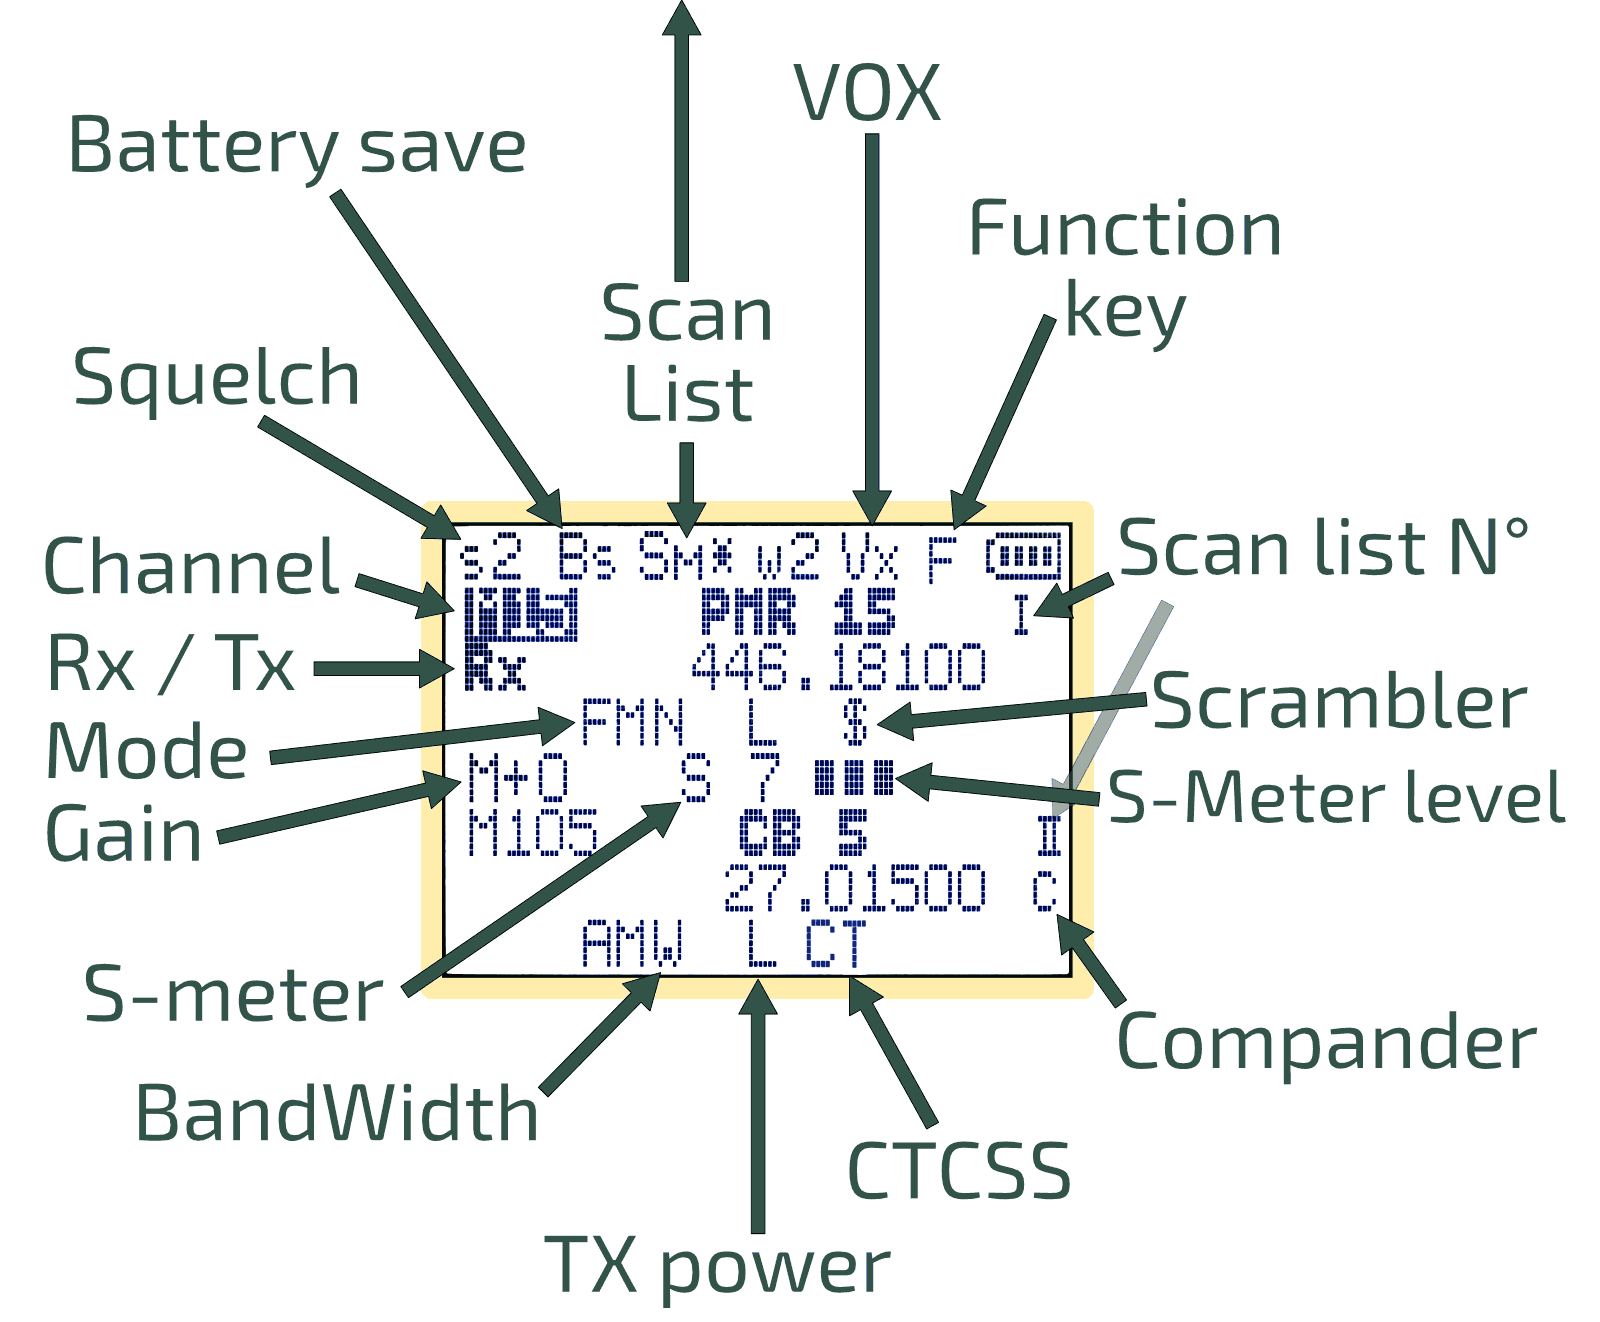
SQL |
|
0-9 (0 = Monitor) |
|
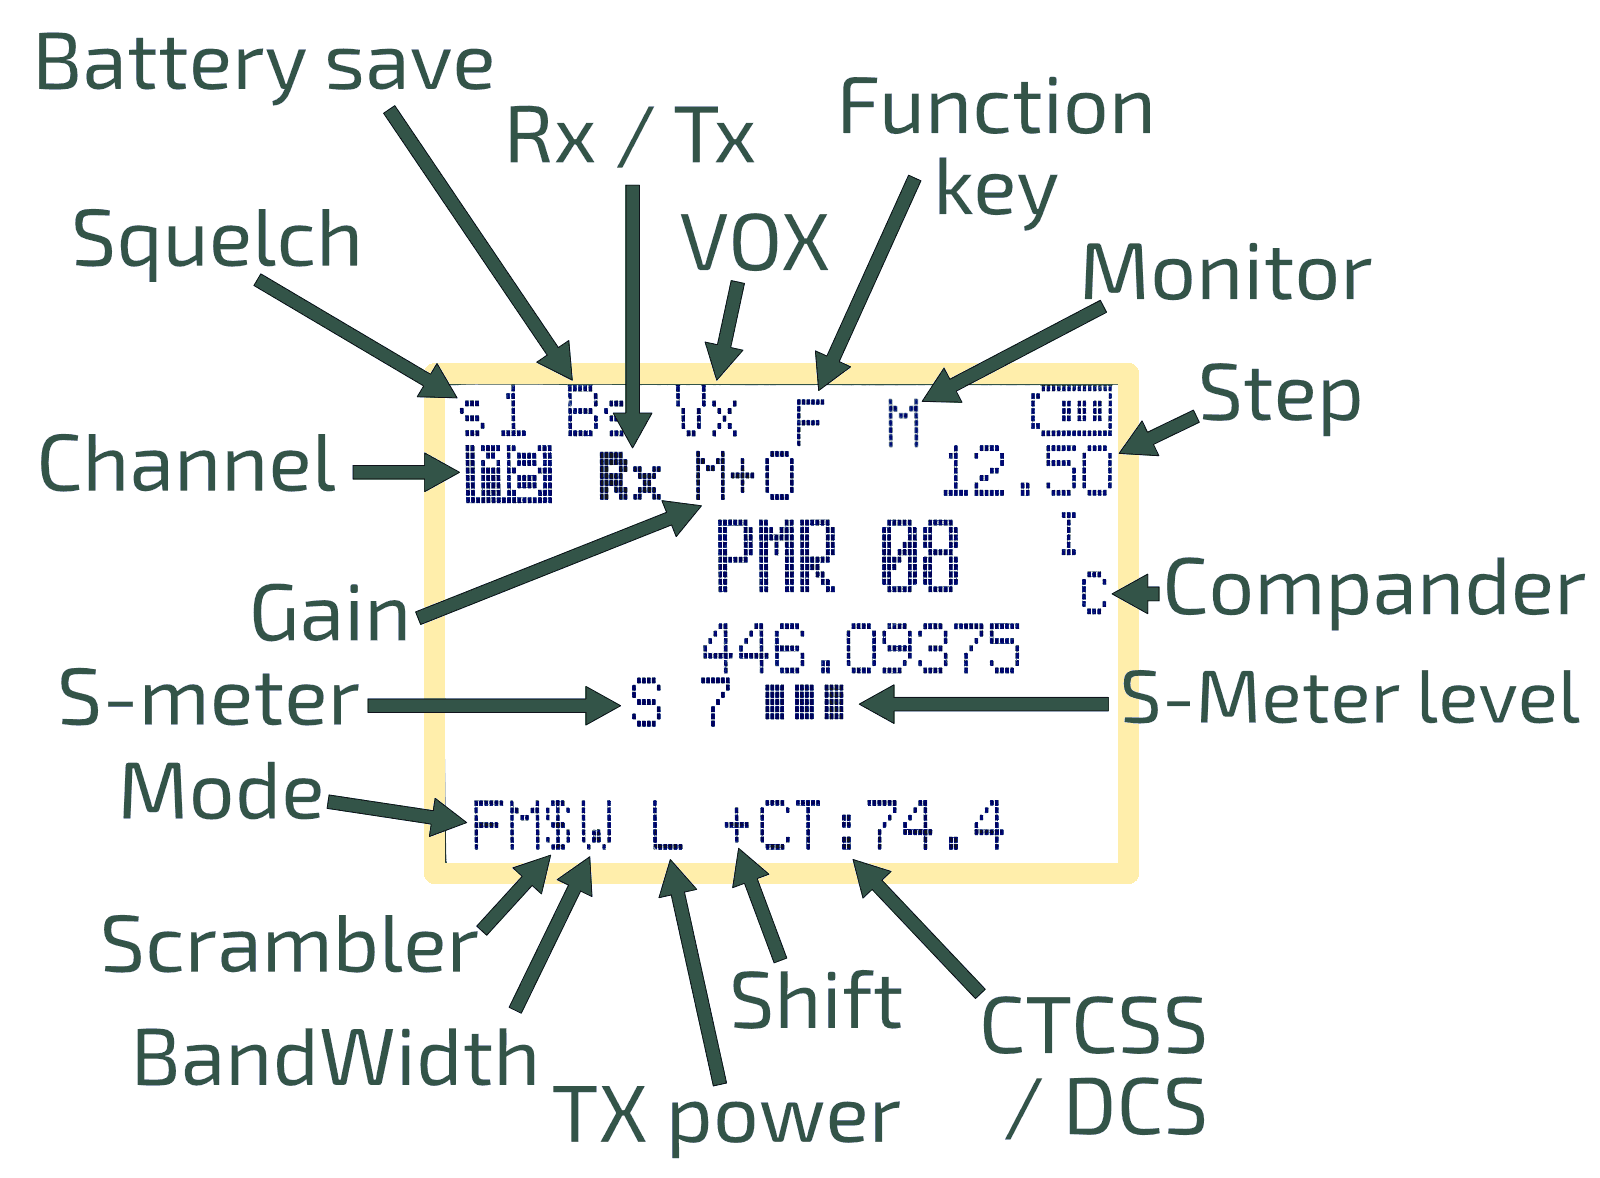
To correctly adjust squelch levels, switch off the dual watch.
Each VFO line (A and B) has its own Squelch level. Useful in case of dual watch.
|
| 2 |
STEP |
|
0.02, 0.05, 0.10, 0.50, 1.00, 2.50, 5.00, 6.25, 8.33, 9.00, 10.00, 12.50, 25, 100, 1000 |
| 3 |
MODE |
|
FM, AM, DSB, CW |
| 4 |
BW W/N |
|
NARROW-, NARROW, WIDE, WIDE+ |
|
Adjusts as well as the audio filter as the bandwidth.
|
|
|
Audio filter |
BW RF |
|
N– |
1.7kHz |
6.25kHz |
|
N |
3 kHz |
12.5kHz |
|
W |
6kHz |
25kHz |
|
W+ |
9kHz |
25kHz |
| 5 |
Tx PWR |
|
LOW, MID, HIGH |
| 6 |
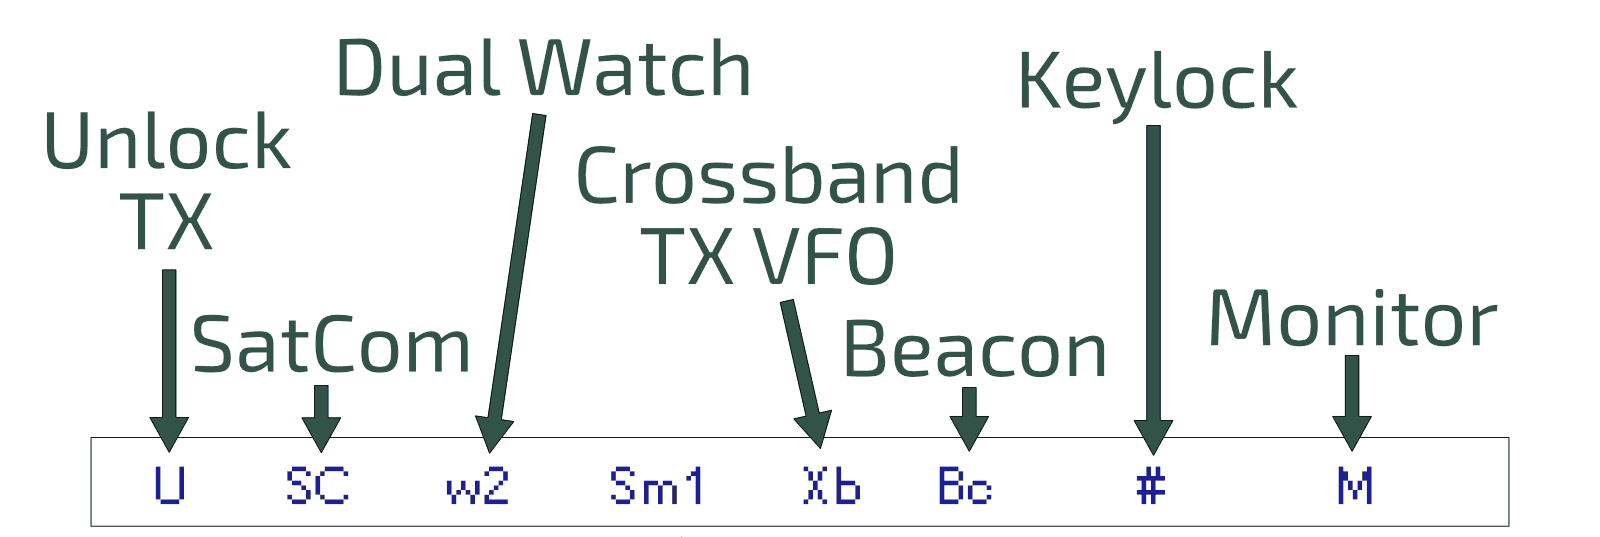
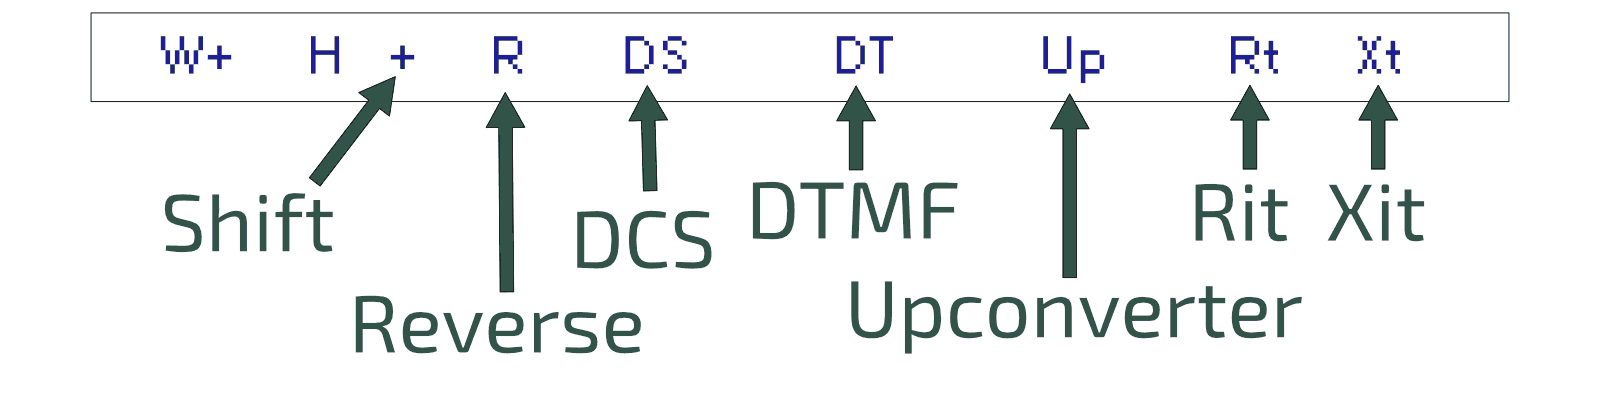
Tx DIR |
OFF |
OFF, +, − | Direction Shift/Offset repeater bridges. |
| 7 |
Offset |
0.000MHz |
0 to 999.9999 MHz | Frequency shift/offset for repeater bridges. |
| 8 |
RxCTCS |
OFF |
OFF, 67…..250.3Hz | Sets a CTCSS subtone in reception. |
| 9 |
TxCTCS |
OFF |
OFF, 67 to 250.3Hz | Sets a CTCSS subtone in transmission. |
| 10 |
Rx DCS |
OFF |
OFF, D023N, D025N, 26…….754 | Set a DCS code in reception. |
| 11 |
Tx DCS |
OFF |
OFF, D023N, D025N, 26…….754 | Sets a DCS code in transmission. |
12
|
Tx TOT |
|
OFF, 30sec, 1min to 5min | TX time limit.
|
| |
With notice at 10 and 5 seconds before closing. |
| 13 |
BusyCL |
OFF |
OFF, ON | Lock PTT if busy. |
| 14 |
ChSave |
CH-001 |
1 to 200 |
| 15 |
ChName |
CH-001 |
10 characters max |
| 16 |
ChCanc |
CH-001 |
Delete stored channel. |
| 17 |
ChDisp |
FREQ |
FREQ, CHANNEL NUMBER, NAME, NAME_S FREQ_L, NAME_L FREQ_S. |
| |
In Single mode you can choose the font size for the channel name and its frequency, L = Large and S = Small. |
| 18 |
BLTime |
1 min |
OFF, 5sec, 10sec, 20sec, 1min, 3min, RX/TX, ON, NIGHT |
| |
RX/TX: Assumes the exact time of transmission or reception. ON: Always on.
|
| 19 |
BLMode |
RX/TX |
RX/TX, OFF |
| |
Determines the event that causes the display to light up. |
| 20 |
BEEP |
ON |
ON, OFF | Keys sound. |
| 21 |
Sc REV |
CARRIER |
CARRIER, SEARCH, TIME, LOG |
| |
How do the scan resumes.
CARRIER: resumes scanning after the signal has disappeared.
SEARCH: stops when it finds a busy channel and stays there.
TIME: Stops on busy channel for 5 sec. then starts again.
LOG: This will be used in the future to link the radio to an app. |
| 22 |
KeyLok |
OFF |
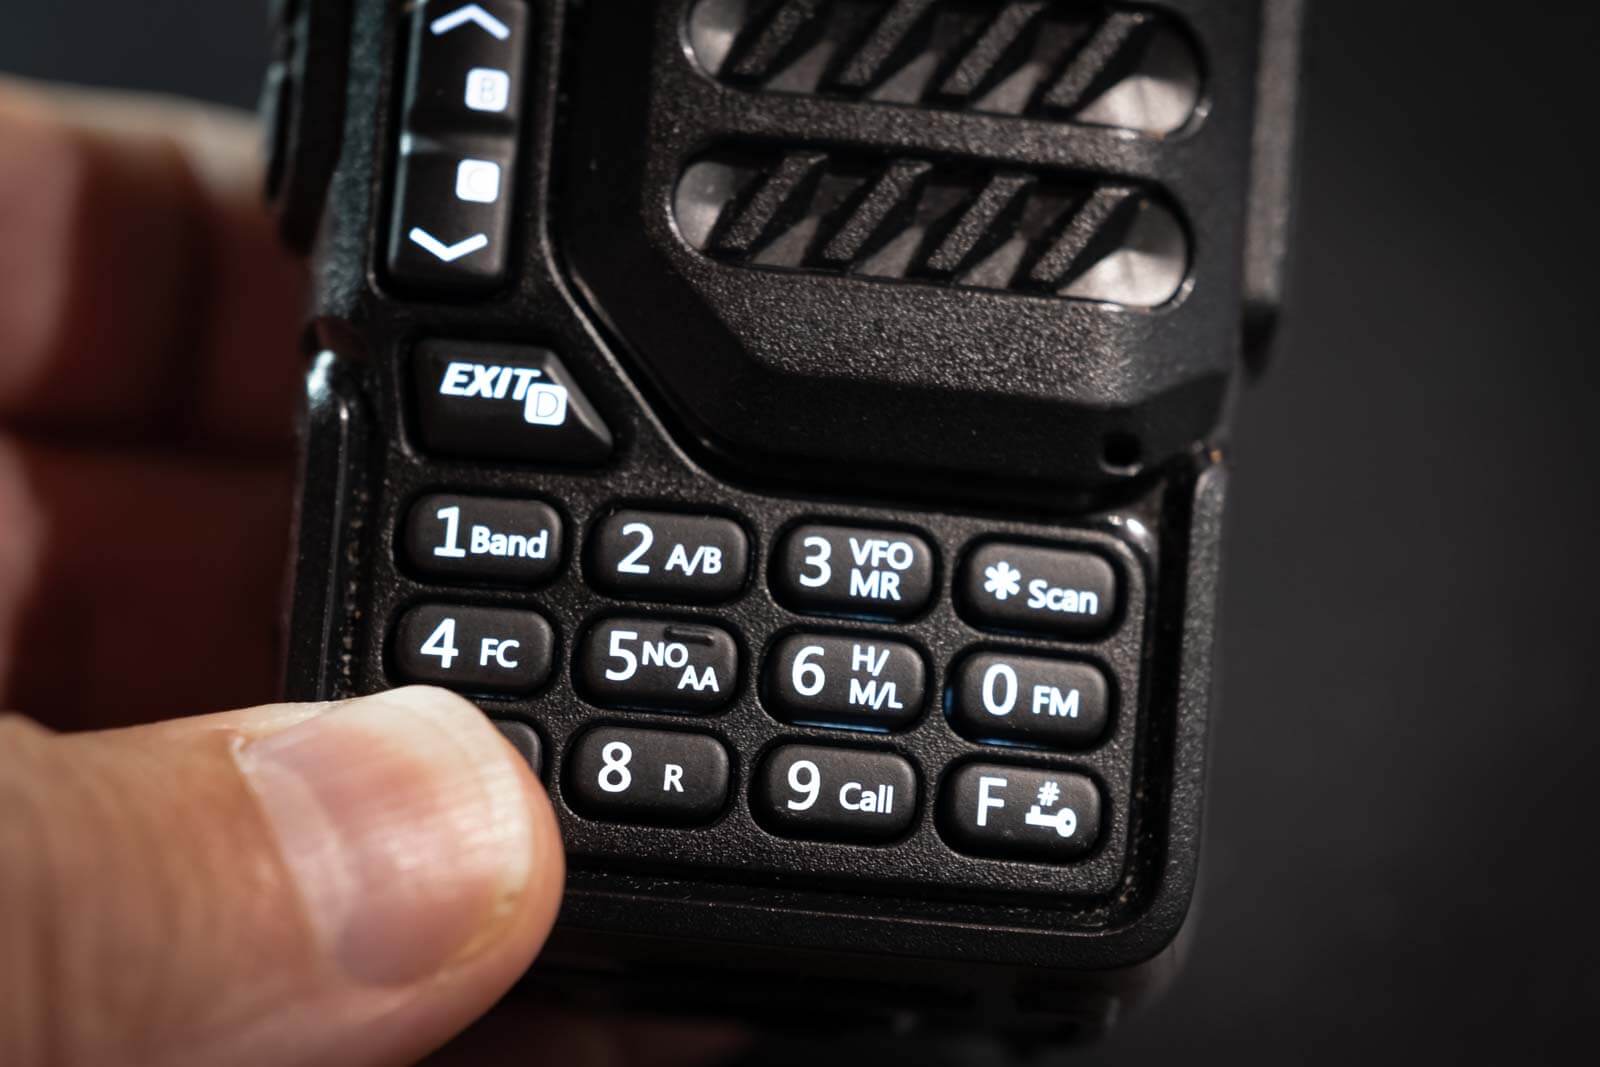
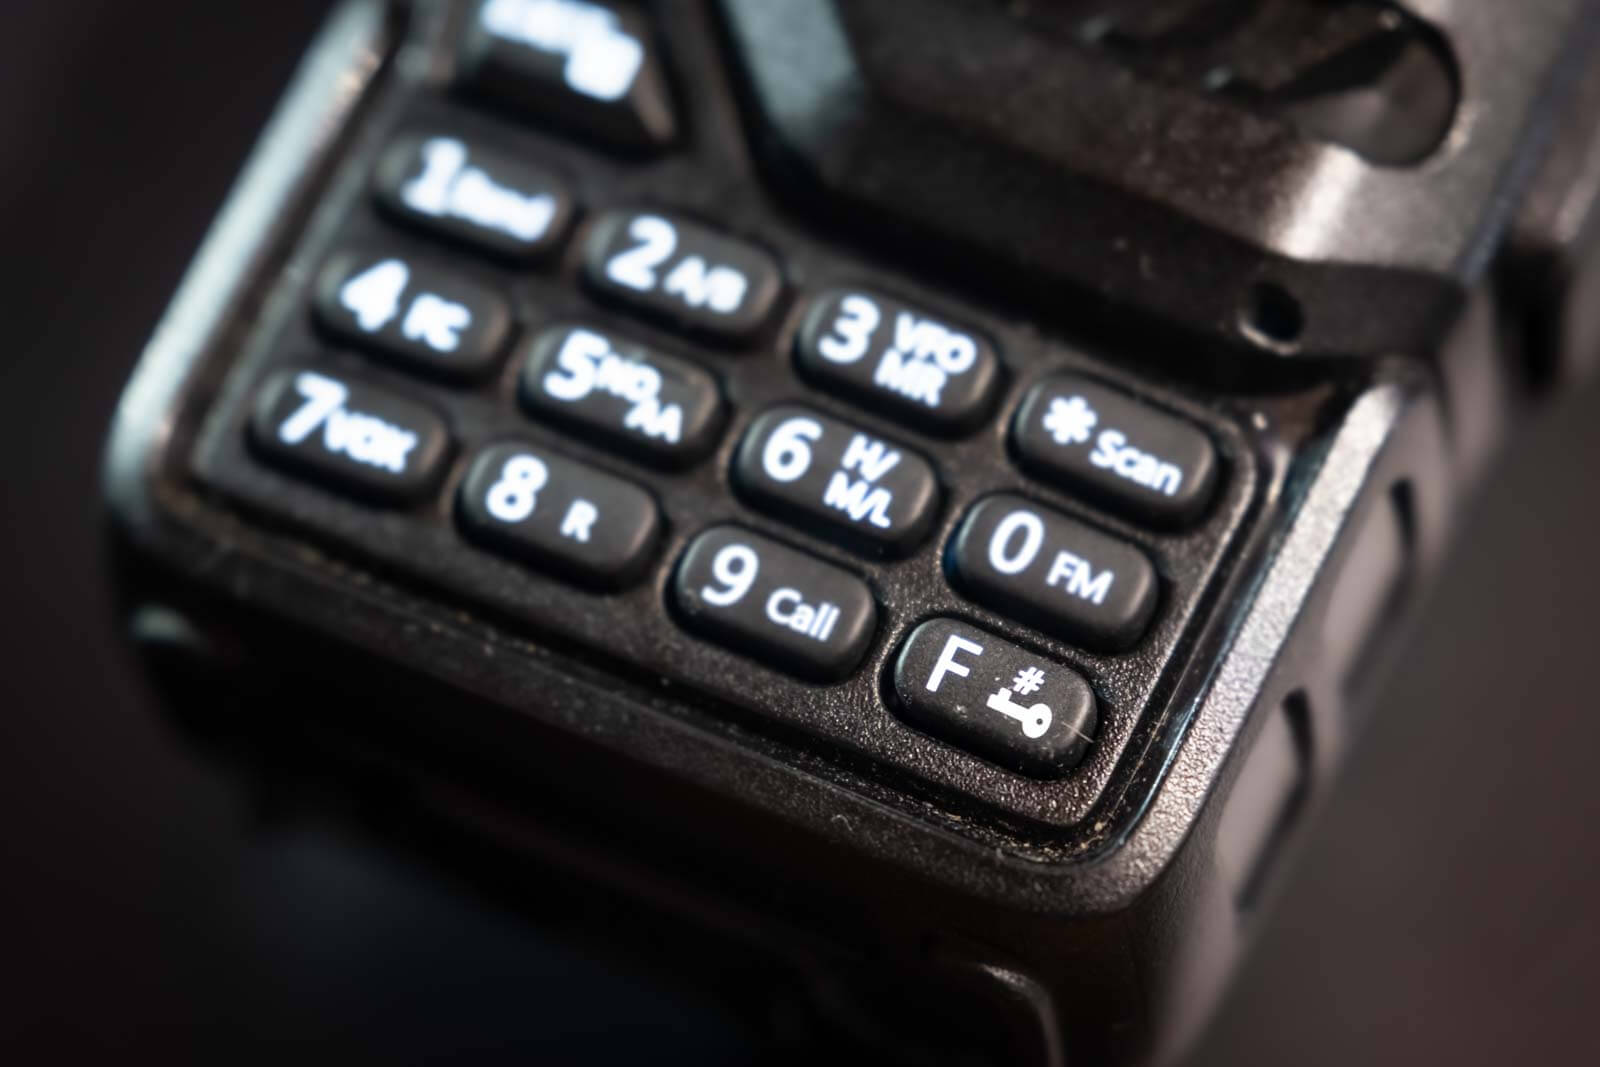
OFF, AUTO | AUTO locks the keyboard after 10 sec. of inactivity. The keyboard can be activated temporarily with a long press on the F#🗝 key. |
| 23 |
TailTE |
ON |
ON, OFF | It eliminates the tail tone, i.e. the small rustling noise that occurs when releasing the PTT when using a bridge. |
| 24 |
RipTTE |
OFF |
OFF, 1*100ms to 10*100ms | Eliminates head hum in Rx. When the bridge carrier is released, it closes the audio for the set time. |
| 25 |
Scramb |
OFF |
OFF, 2600 to 3500 Hz | Encrypts voice with an obfuscating frequency. (FM only). |
| 26 |
Mic dB |
+15.1dB |
+1.1dB to +15.1dB | Increases or decreases microphone sensitivity. |
| 27 |
MicBAR |
OFF |
ON, OFF |
| |
It inserts a volume level bar in the centre.
Useful for DSB transmission, in fact for optimal modulation it is best not to exceed half the scale, so the Mic dB level should not exceed 4 dB.
|
| 28 |
Compnd |
OFF |
OFF, TX, RX, RX/TX |
| |
Compander: compressor/expander filter, enhances vocals (FM only). |
| 29 |
VOX |
OFF |
OFF, 1 to 10 | Smaller = more sensitive. |
| 30 |
1 Call |
CH-001 |
One Key Call Channel, scelta del canale di chiamata di emergenza ad unico tasto. |
| 31 |
ScLisT |
LIST2 |
LIST2, LIST1, ALL | Channel scan list selection. |
| 32 |
Own ID |
102 |
102 | Set a personal ID. |
| 33 |
UPCode |
123 |
123 | Initial selective code. |
| 34 |
DWCode |
456 |
456 | Final selective code. |
| 35 |
D Lmon |
ON |
OFF, ON| DTMF Local monitor: DTMF sidetone switch. (PTT + S2 = Tone 1750).
Allows you to monitor, listen locally to the tones sent by the radio. |
| 36 |
D RSP |
DO NOTHING |
DO NOTHING, BOTH. REPLAY, RING |
| 37 |
D Hold |
10s |
5s to 60s |
| 38 |
D PRE |
30*10ms |
|
| 39 |
D DCD |
OFF |
ON, OFF |
| 40 |
D List |
CALL1 ID:101 |
|
| 41 |
D Live |
ON |
ON, OFF |
| 42 |
Dig ID |
OFF |
OFF, DTMF CALL ID, DTMF BEGIN, DTMF END, DTMF BEG+END, ZVEI1 BEGIN, ZVEI1 END, ZVEI1 BEG+END, ZVEI2 BEGIN, ZVEI2 END, ZVEI2 BEG+END, CCIR-1F BEGIN, CCIR-1F END, CCIR-1F BEG+END; CCIR-1 BEGIN, CCIR-1 END, CCIR-1 BEG+END.
CCIR-1F = 50 ms
CCIR-1 = 100 ms
|
| 43 |
DigSRV |
OFF |
OFF, Single, Roger, MDC 1200, Apollo Quindar, Digital Code ID |
|
Acoustic or digital signals sent at the start and/or end of the call. (7.5) |
| 44 |
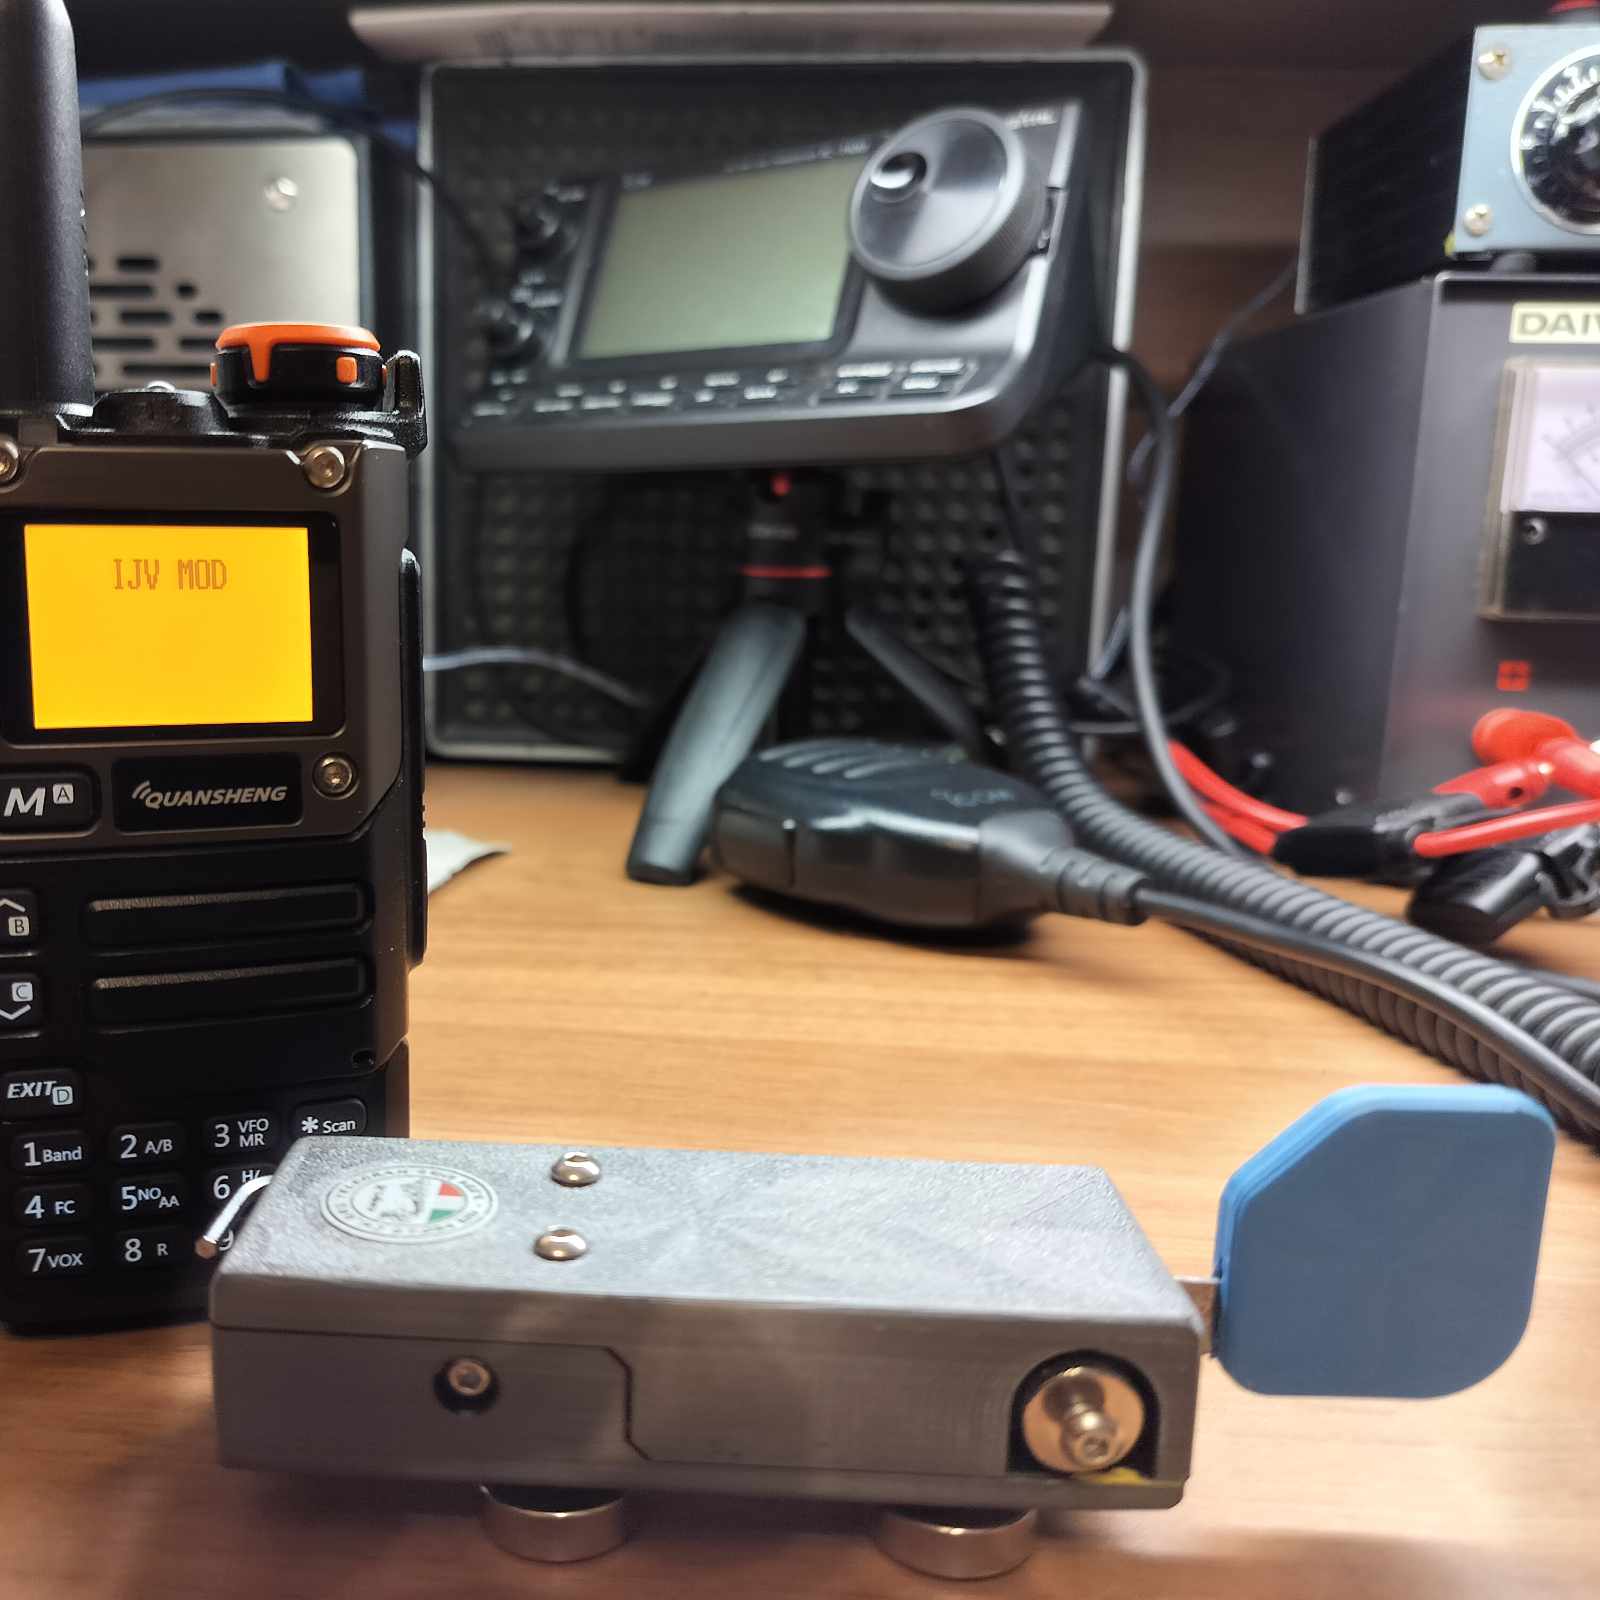
Info |
|
IJV MOD V.x.x, Batt Volt. |
| 45 |
Beacon |
|
OFF, 5sec, 10sec, 30sec, 5min, 10min, 20min. |
| 46 |
BatSav |
OFF |
OFF, 50%, 67%, 75%, 80% |
| |
It allows the radio to remain active for only a few moments, thus reducing consumption.
The cycle consists of 4 phases of 100mS each, saving on how many times in this cycle the Rx is active or in suspension.
The greater the savings, the lower the performance in reception, especially in scanning. |
| 47 |
dBm/Sm |
S/Meter |
S/Meter, RSSI dB |
| 48 |
SatCom |
OFF |
ON, OFF |
|
Activates the filter change circuit for frequencies after 240 MHz and sets the radio chip to a +9dB increase in reception, this once activated remains in memory the next time it is switched on. Similar to a preamplifier, to be used in exceptional cases of low signal because it can cause distortion in listening, switch it off when not needed.
The message RESET SATCOM appears. |
| 49 |
UpConv |
OFF |
OFF, 50, 125 |
|
Set the radio to operate with a transverter (Upconverter) for the HF.
It offset itself to 50 or 125 Mhz from the display reading and disables Tx on that frequency.
It only works for bands 1 and 2. Then choose how high to scale then do F+8, 'Up' will appear below the frequencies. |
| 50 |
Preset |
|
26-30, 70-75, 75-80, AIR 1, AIR 2, VHF 1, VHF 2, SEA, SERV, UHF, LPD, PMR |
|
It sets up reception and scanner filters with search limits per selected band.
Pressing the M button stores the bands and returns directly to the main VFO screen.
AIR 1: 118-126, AIR 2: 126-137, VHF 1: 142-148, VHF 2: 150-155, SEA: 155-163, SERV: 162-174, UHF: 430-433, LPD: 433-436, PMR: 446-447 |
| 51 |
Rx AGC |
|
MAN, FAST, SLOW |
|
Auto Gain Control: in MANual, the sensitivity of the RF Gain can be changed by pressing the F+ button∧ o F+∨.
FAST or SLOW: determines how quickly or slowly the AGC recovers gain after attenuating a strong signal. (7.3)
In Rx, it appears to the left of the centre line: M+0, FST or SLW. |
| 52 |
Tx VFO |
SAME VFO |
SAME VFO, VFO A, VFO B |
|
In Dual RX, choose the TX channel. Same as RX, A or B.
If set to VFO A or B, 'Xb' appears on the top line of the screen.
(Cross-Band Receiving/Manual Transmission)
|
| 53 |
DualRX |
ON |
ON, OFF (Dual Watch) |


 A/B.
A/B.
 FM.
FM.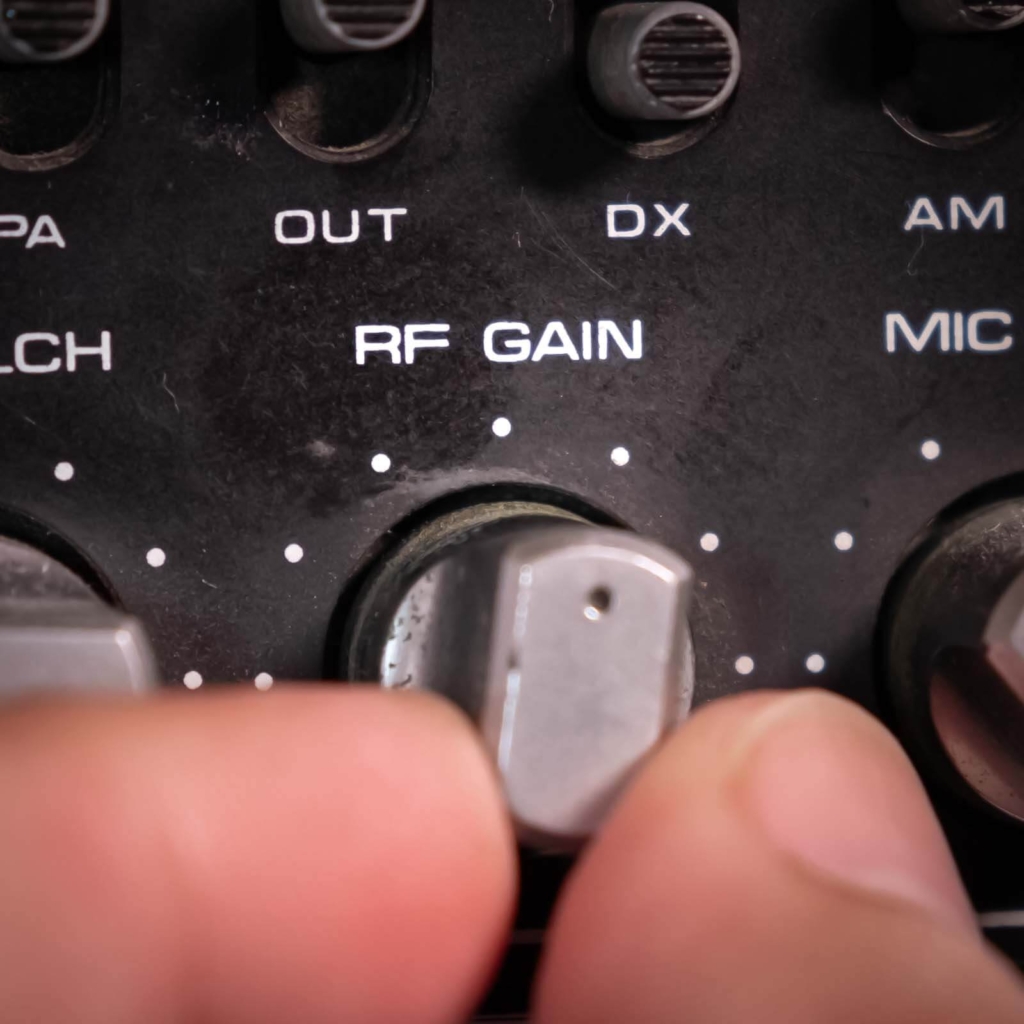

 Band to switch between VFO and MR mode.
 VFO/MR to start the manual FM channel search process. In this process, users must manually store found channels.
 FC. The FM symbol is flanked by 'Lock'.
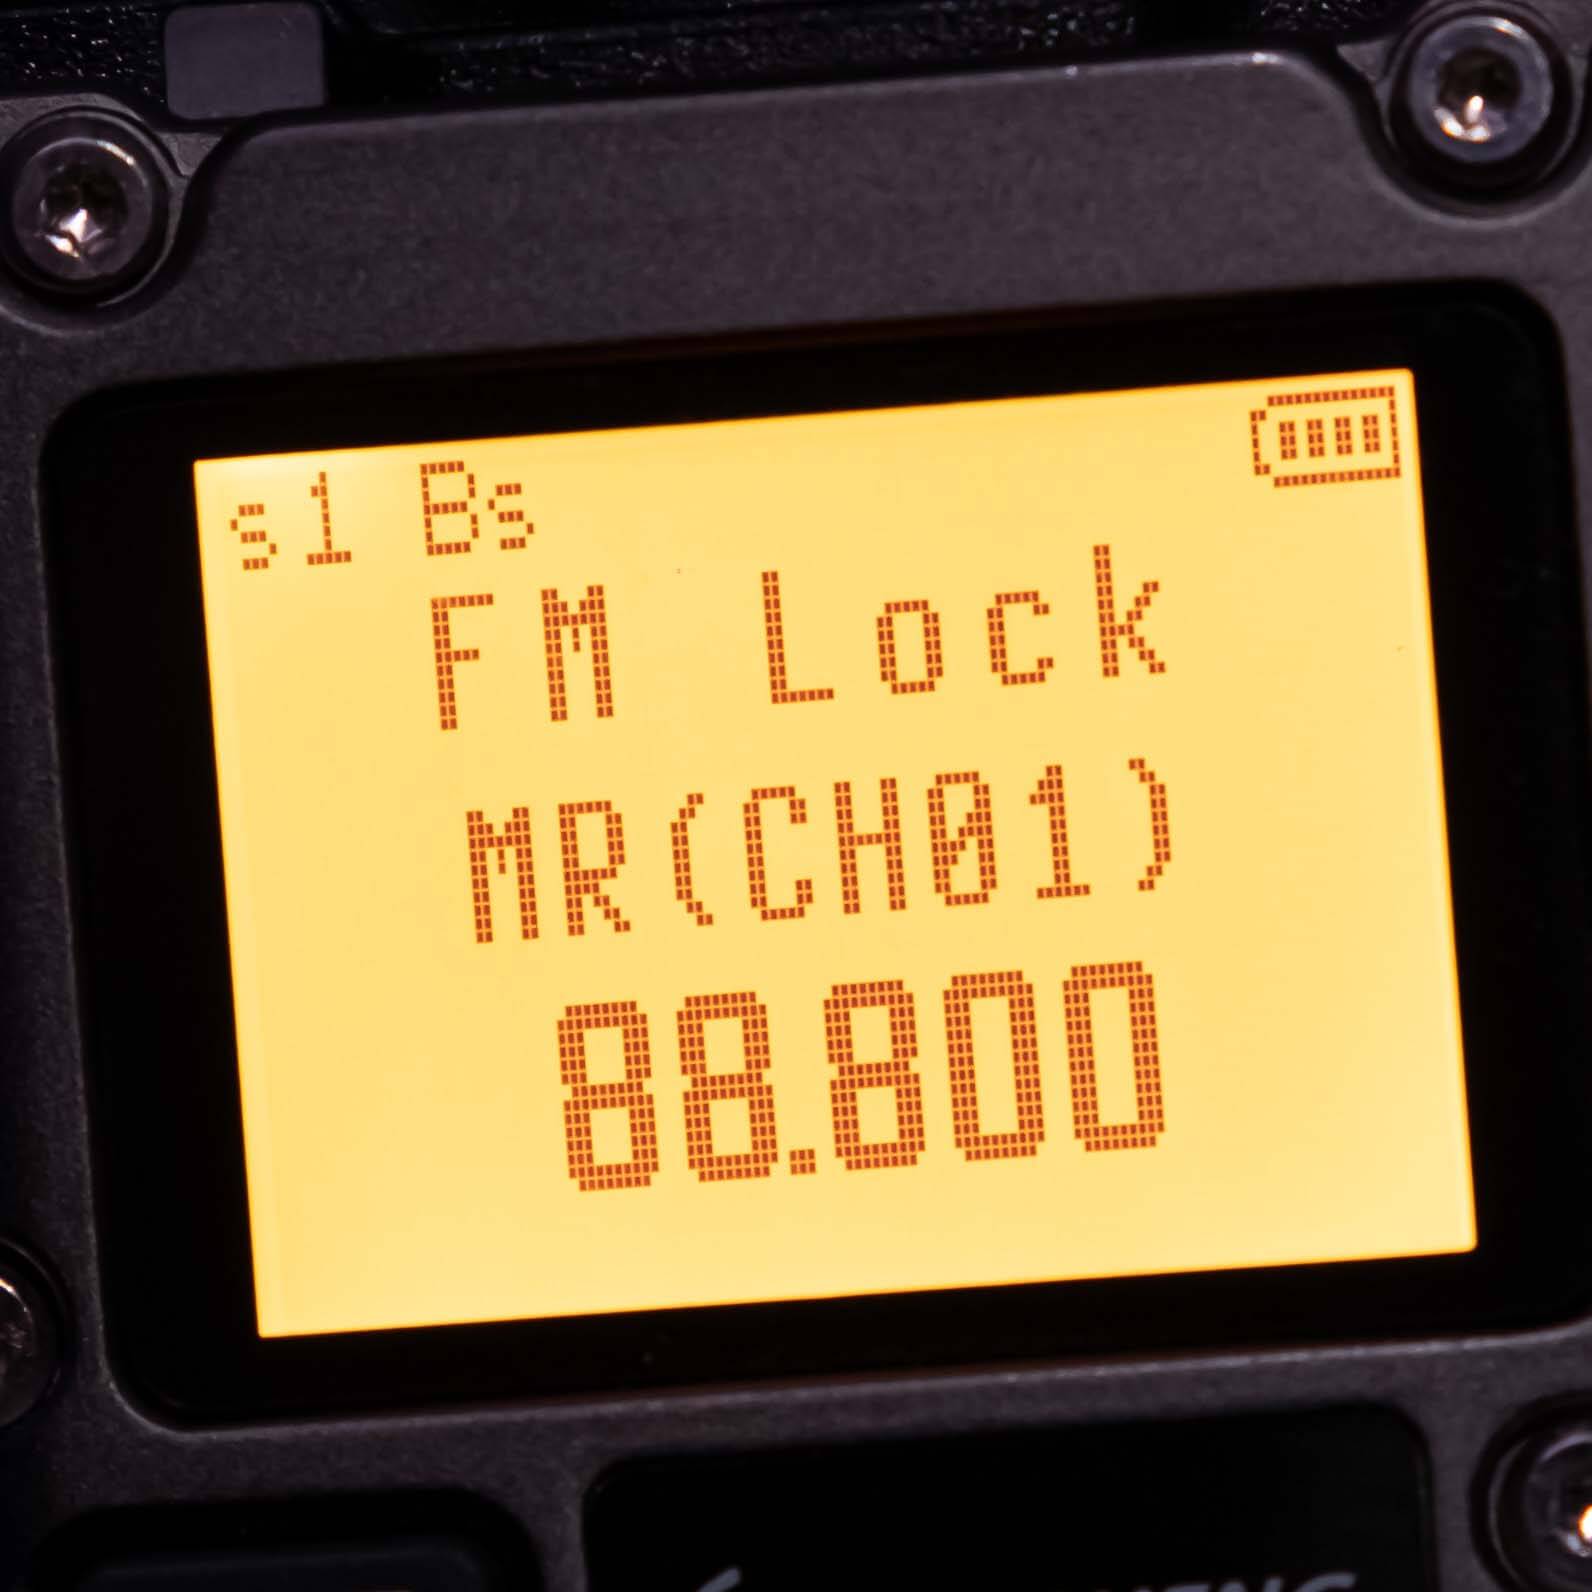


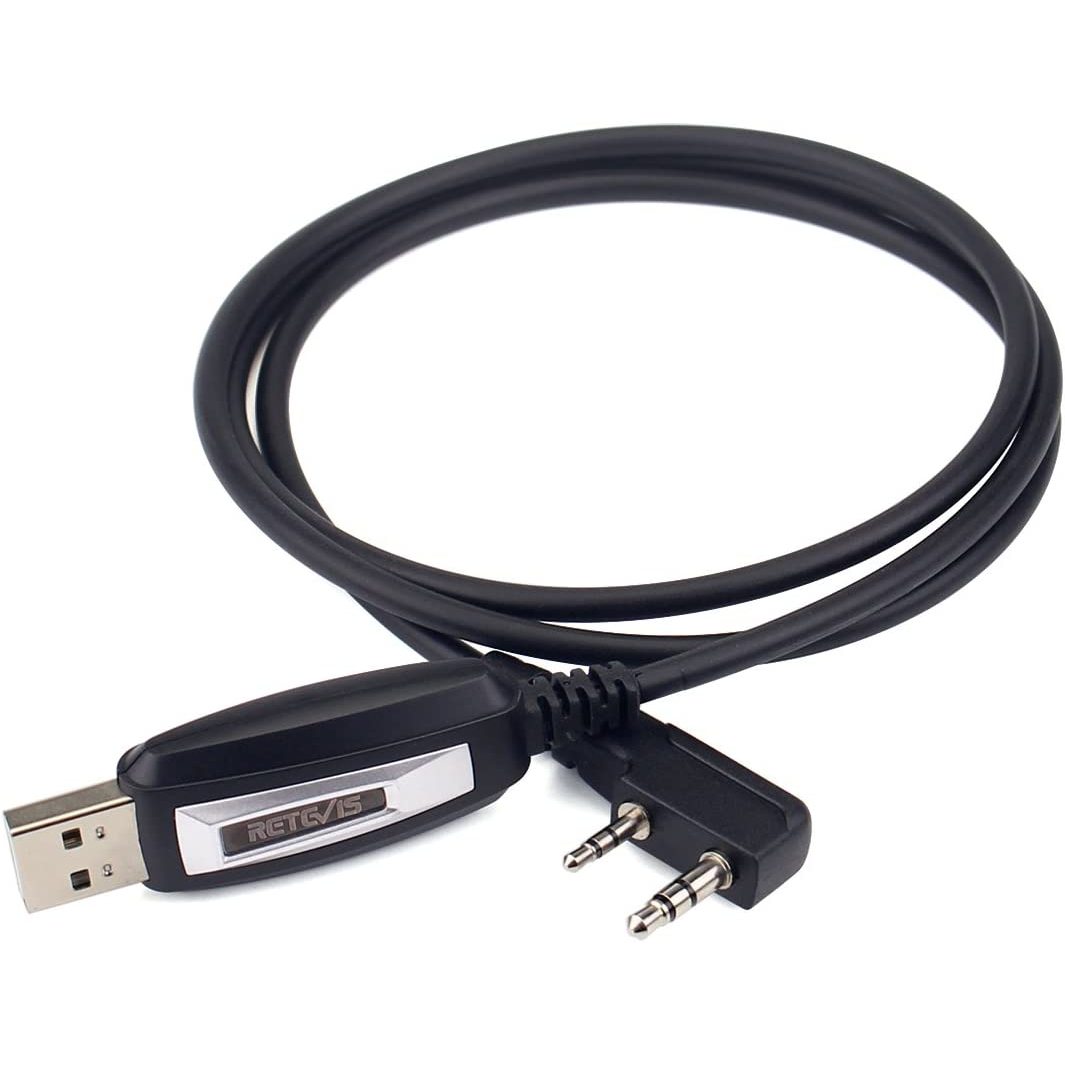
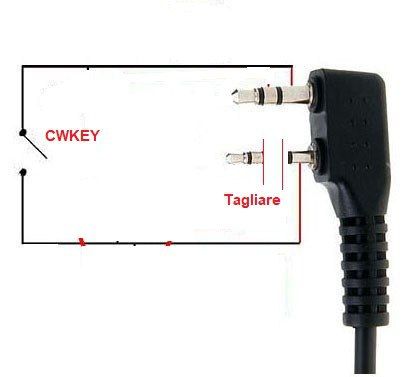
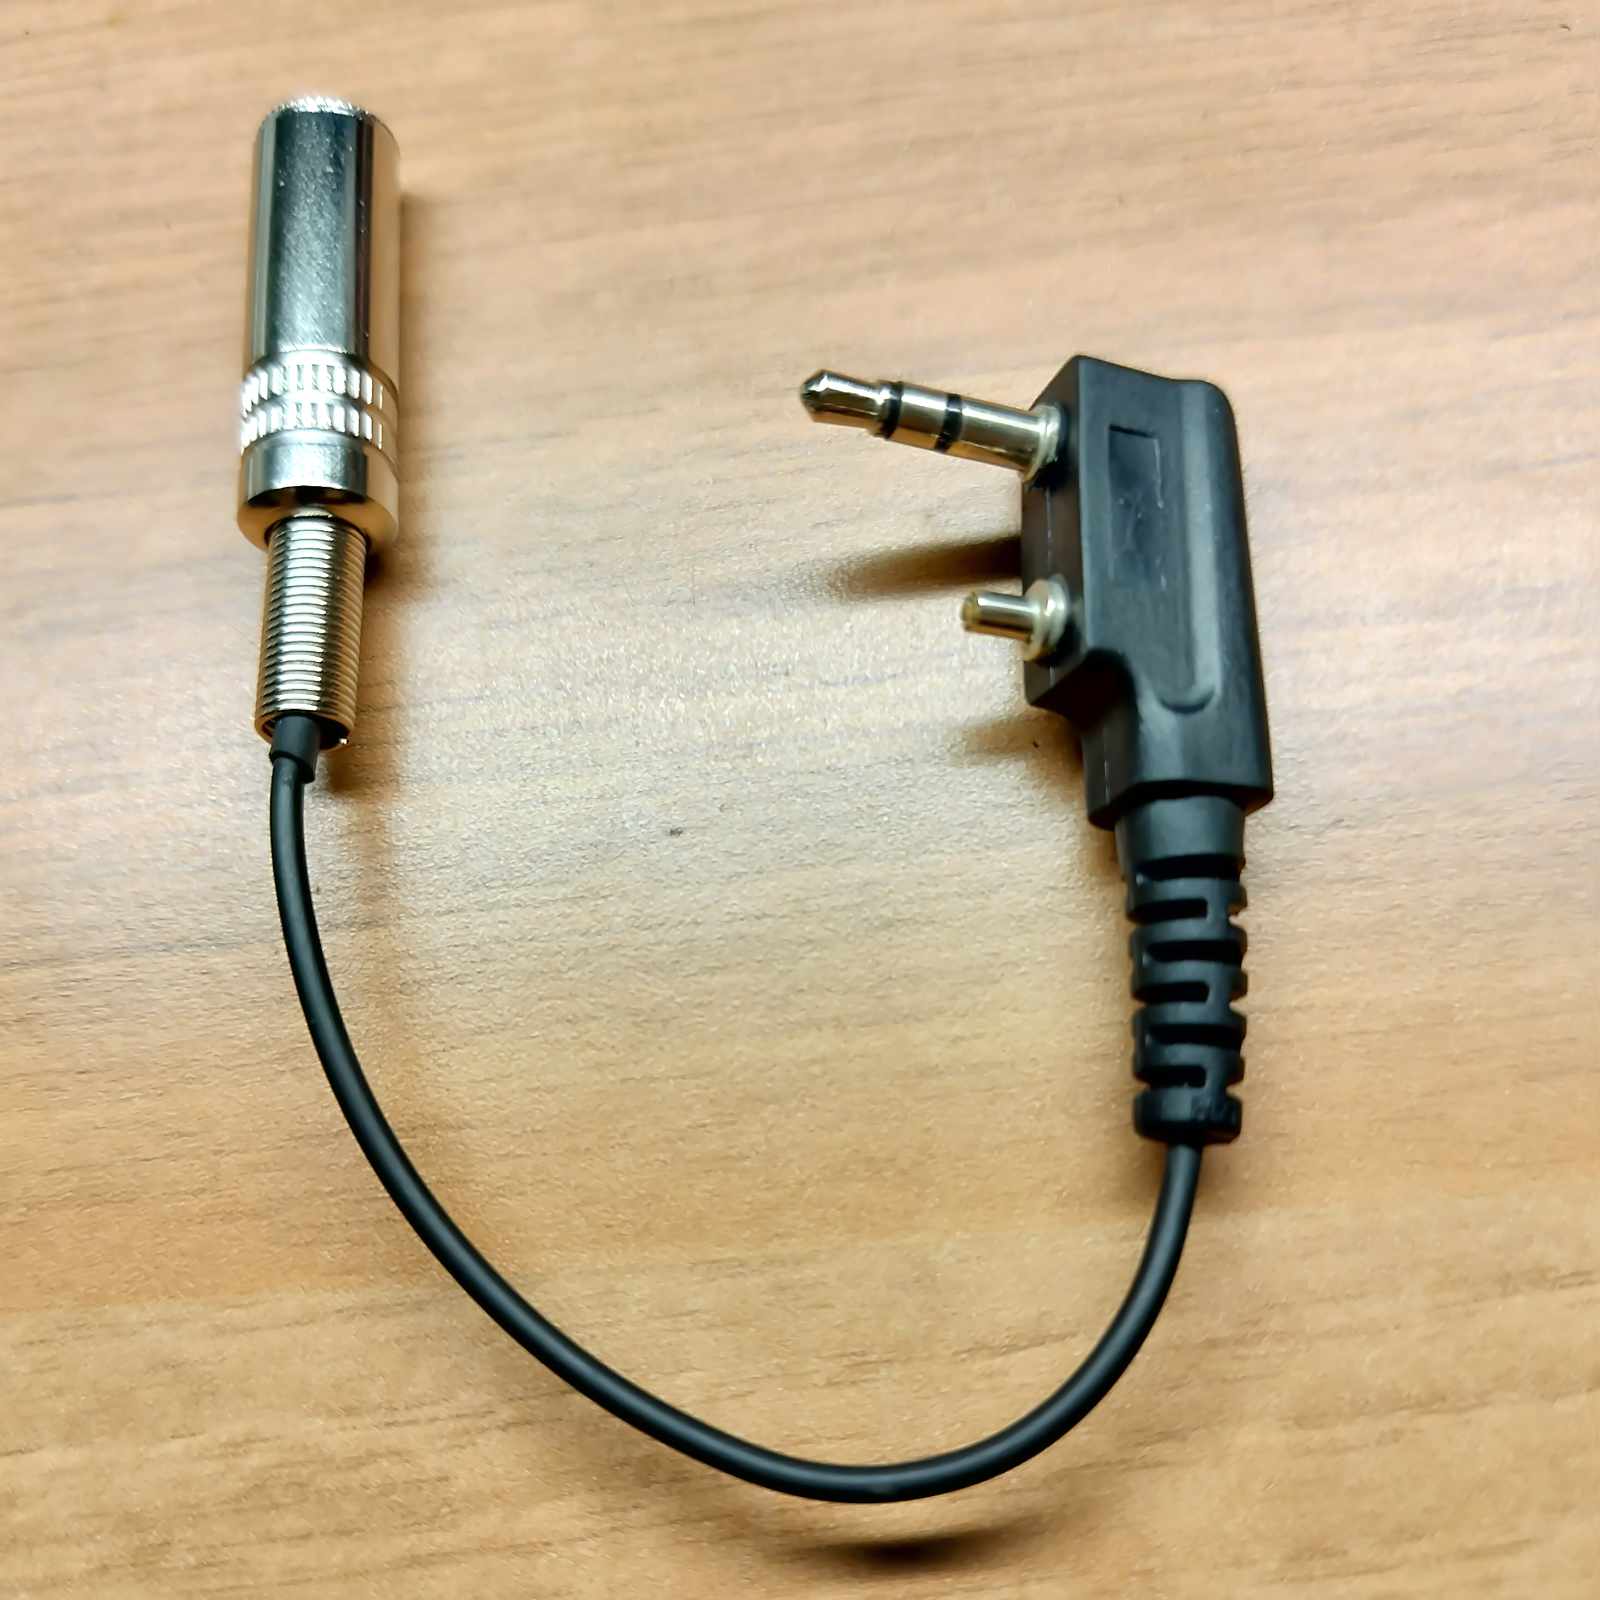
 Link for Kenwood cable
 Link for Kenwood cable